
How to: Get Your Client Portals Set Up
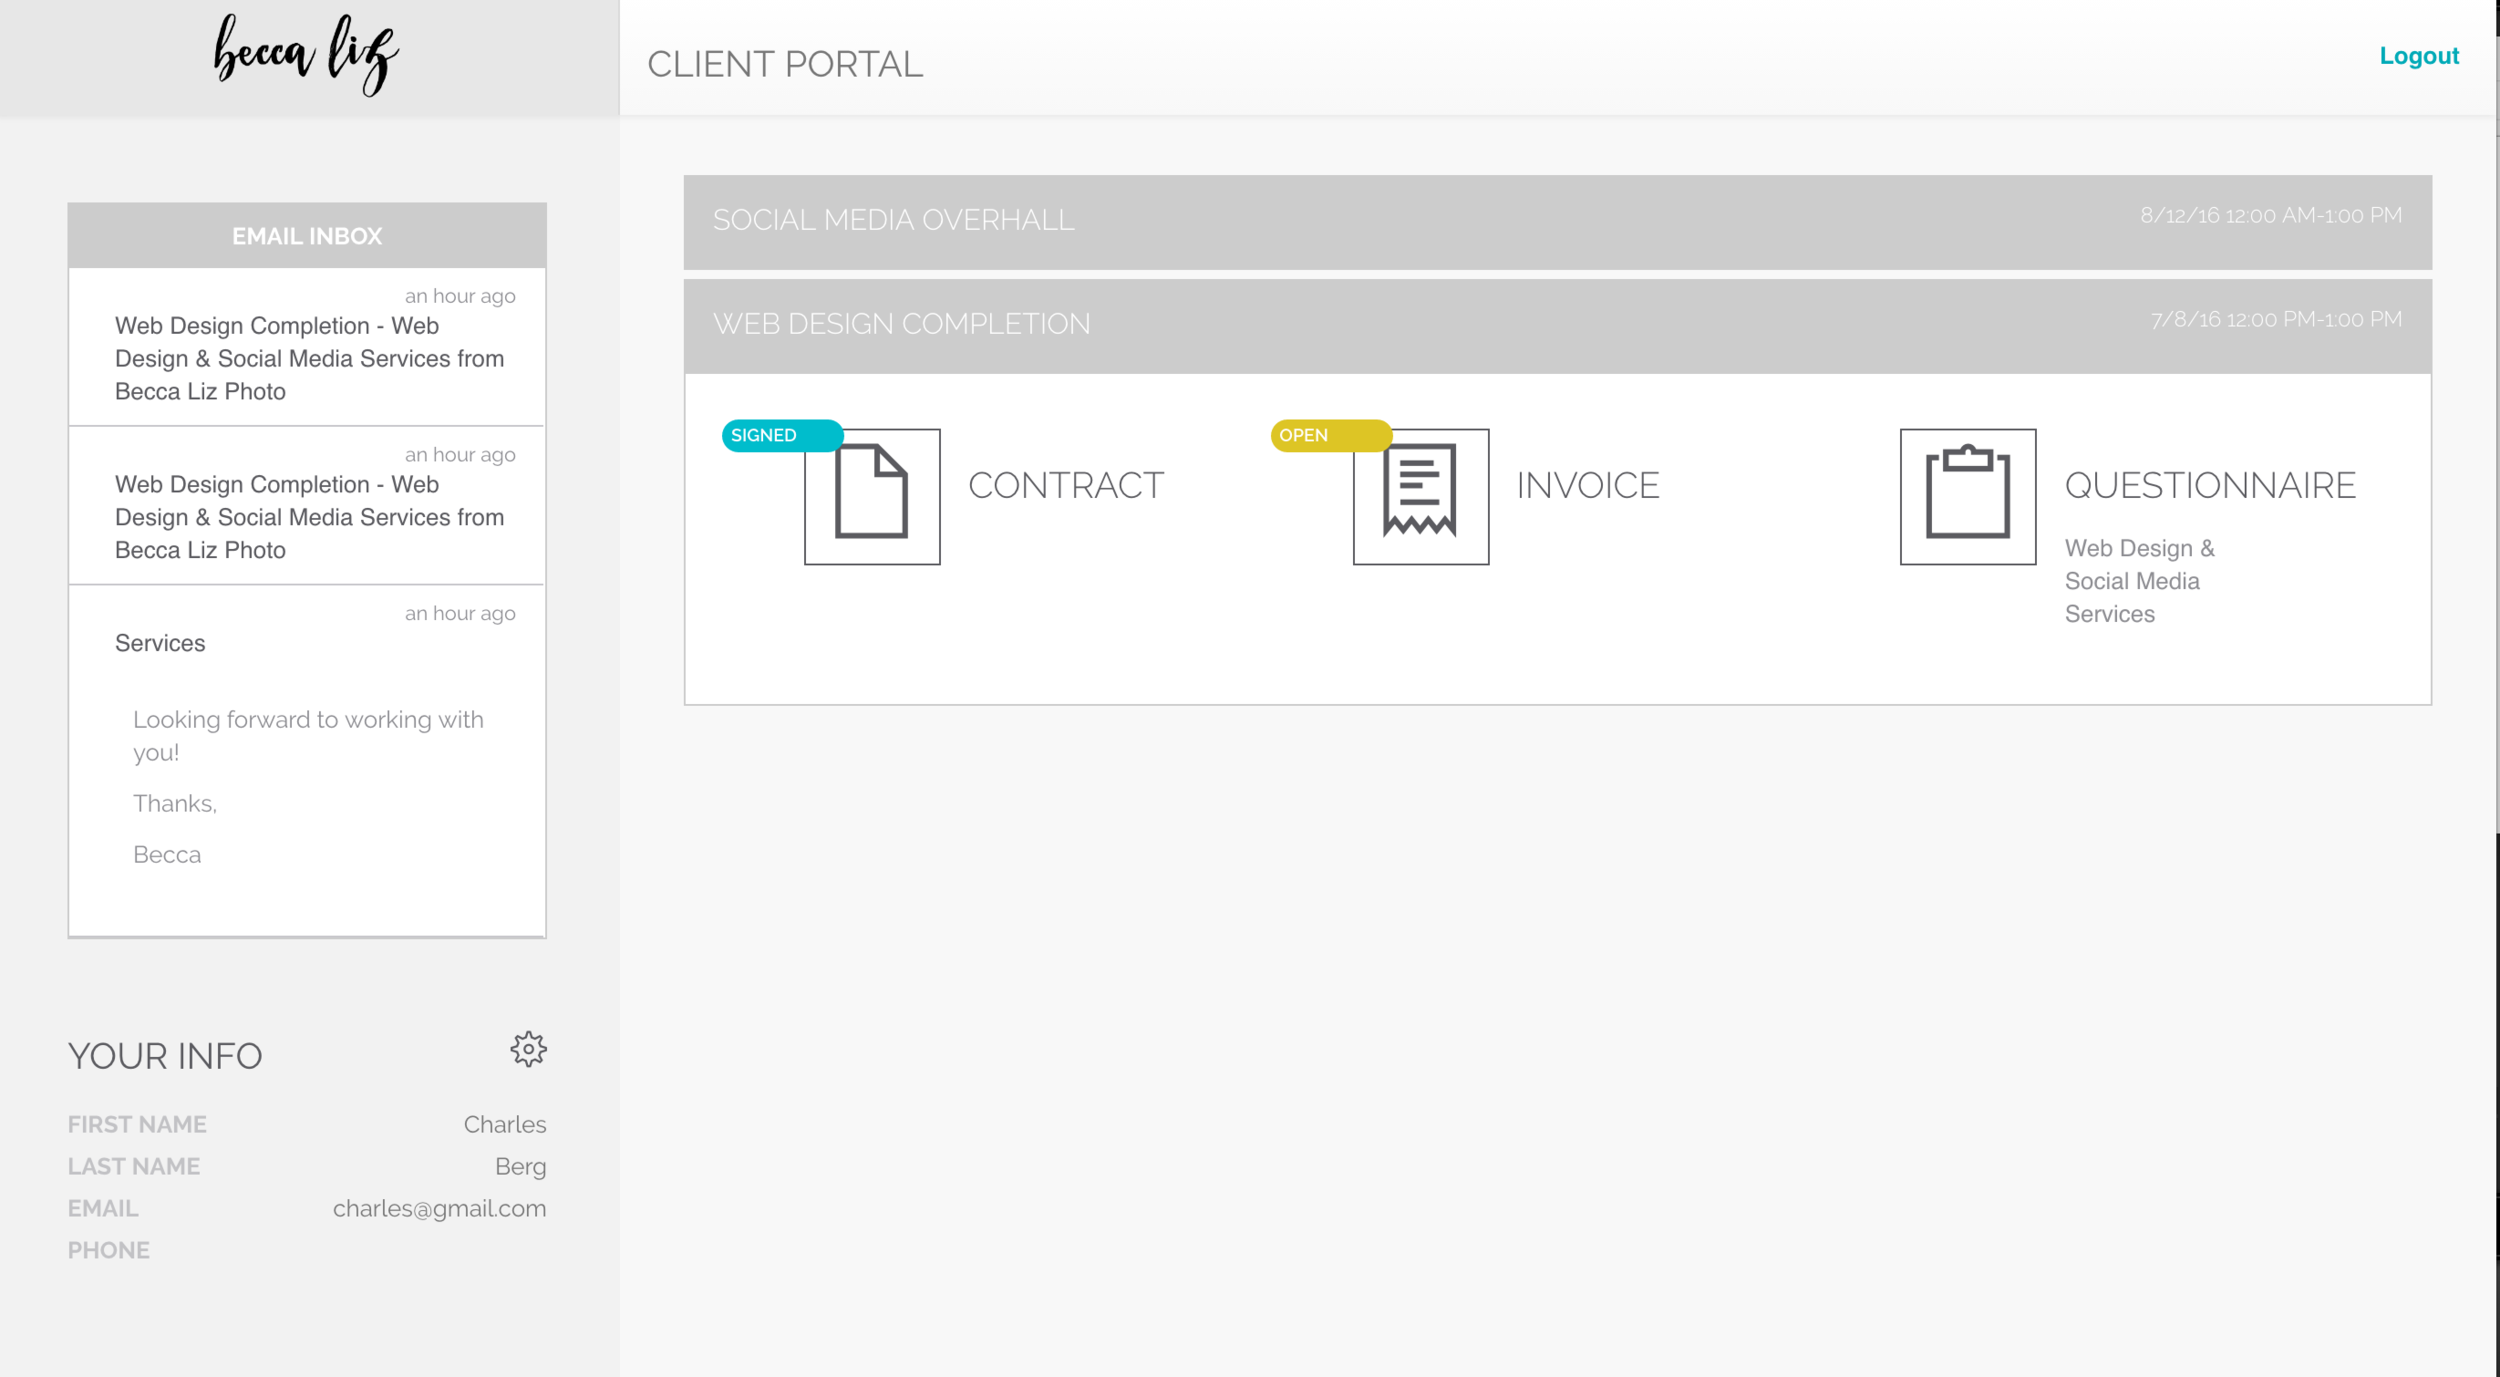
We are thrilled to launch our client portals on Dubsado this week. Now not only can you stay organized, but your clients can too. Having one central location for all jobs related to you and your business will keep life easy.
Set up is SUPER easy and really only takes about 30 seconds, but I just want to show you around and all it can do!

Dubsado-Client-Portal
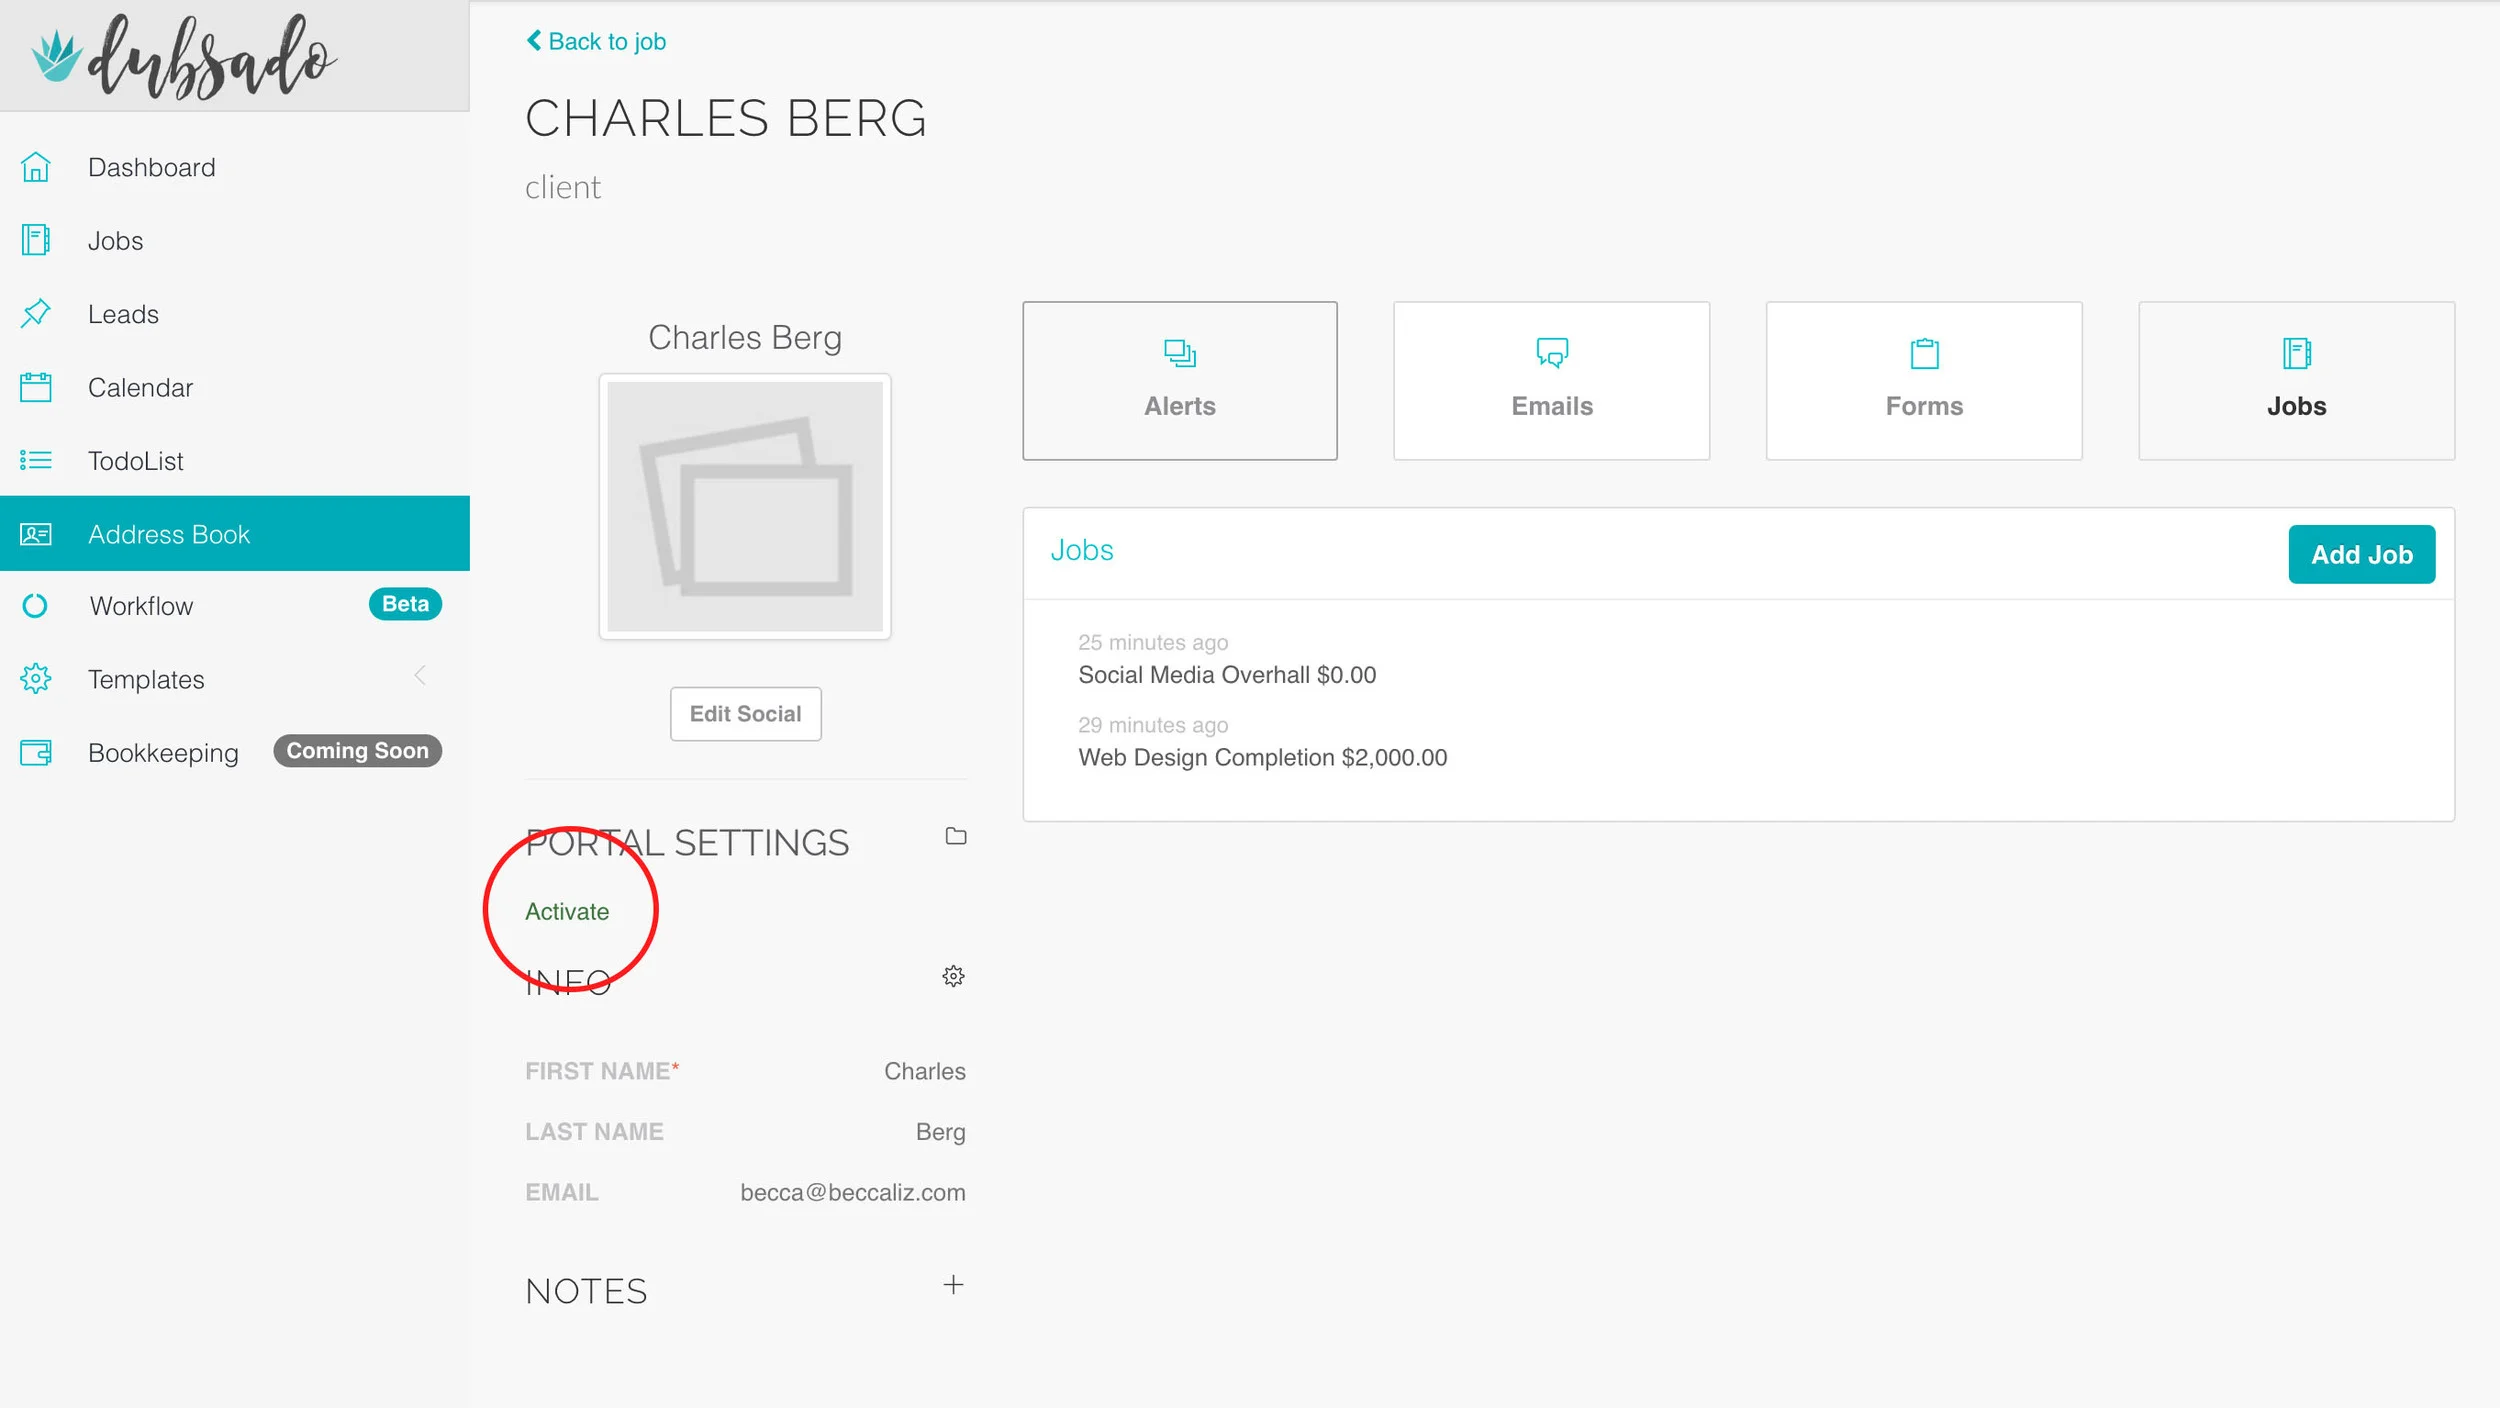
Client-Portal-Dubsado
Screen Shot 2016-06-23 at 8.47.16 PM
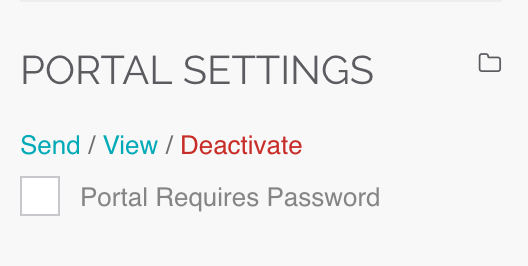
Screen Shot 2016-06-23 at 8.58.04 PM
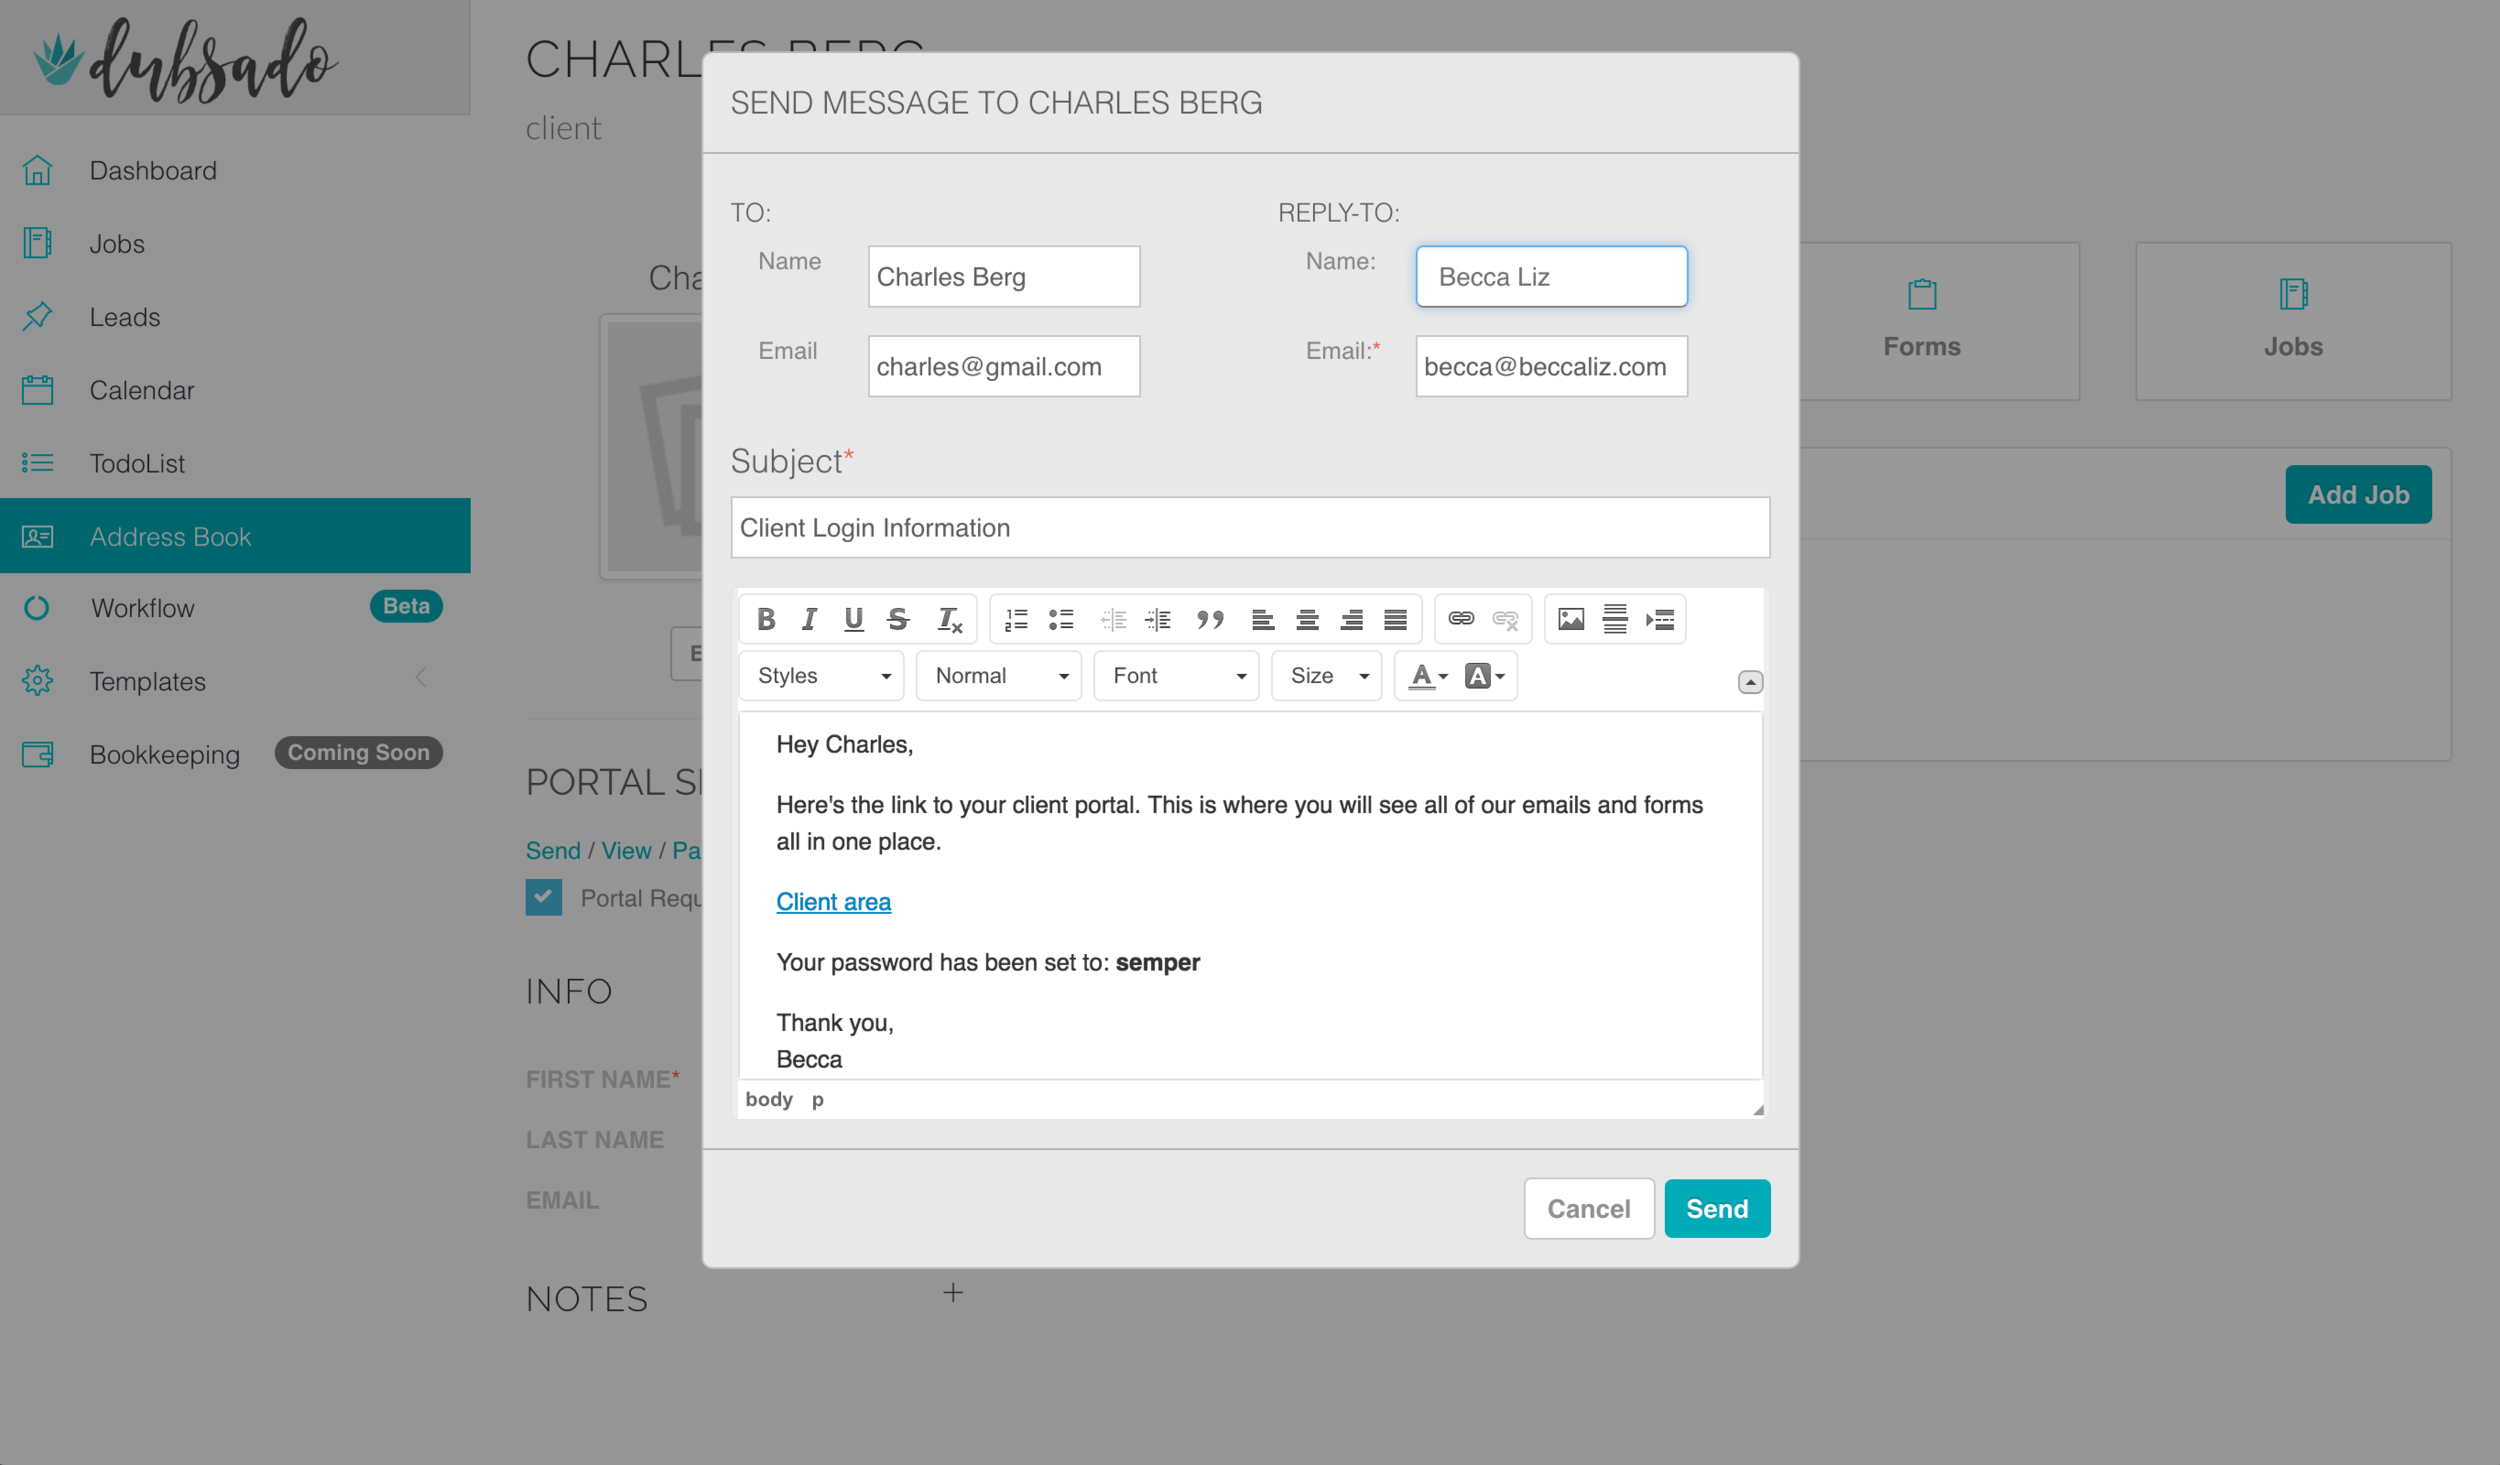
Screen Shot 2016-06-23 at 10.19.46 PM
Here is a video tutorial as well:
Enjoy! Hope your clients love it as much as we do.
Becca & Jake